EN


How to Compare Autoclave Chamber Sizes and Loading Configurations
Choosing an autoclave by chamber liters alone is a common purchasing mistake. In medical instrument processing, the useful question is not “How large is the chamber?” but “Which validated load can this autoclave process safely, repeatedly, and within the working day?” A chamber that looks generous on a specification sheet can be a poor fit if trays, pouches, hollow instruments, drying needs, or access clearances restrict how it is actually loaded.
From a biomedical-engineering perspective, compare an autoclave as part of a workflow: the instruments entering the department, the preparation method, the cycle selected, the people loading the chamber, and the records needed after each cycle. That approach makes nominal volume one input among several rather than the decision by itself.
Start with usable capacity, not nominal chamber volume
Autoclave chamber capacity is often expressed in liters, but liters describe enclosed space, not usable throughput. A large cylindrical chamber may still lose practical room to shelves, rack geometry, door clearance, drainage requirements, or a loading pattern that preserves separation. Conversely, a smaller autoclave may meet demand well when the load is simple, cycles are short, and turnaround is predictable.
CDC loading guidance emphasizes that steam must circulate freely around every item. That principle is why an autoclave should not be judged by how tightly it can be filled. Space around packs and between trays is part of the process, not wasted capacity. The usable load also changes with packaging, instrument profile, and whether items are solid, porous, wrapped, or hollow.
Map the work before comparing an autoclave
Build a one-week load map before requesting quotations. Count actual sets or trays, not only individual instruments. Note peak arrivals, the largest routine set, urgent demand, packaging style, and the time needed for cooling, unloading, and documentation. If a department receives instruments in waves, a single oversized autoclave is not automatically the most workable response; cycle availability and contingency coverage may matter more.
- Load mix: Record solid instruments, wrapped sets, bowls, lumen devices, porous textiles, and any special accessories separately.
- Peak pattern: Identify the busiest shift and the maximum number of trays that arrive together.
- Physical fit: Measure tray footprint, height, shelf spacing, and the largest packaged item—not just the room available for the autoclave.
- Turnaround requirement: Include preparation, cycle time, drying, cooling, release checks, and transport in the estimate.
- Resilience: Decide what happens when the autoclave is in maintenance, a load must be reprocessed, or demand exceeds the normal plan.
This load map turns a vague request for “more capacity” into an operational brief. It is also a better starting point for comparing more than one autoclave configuration.
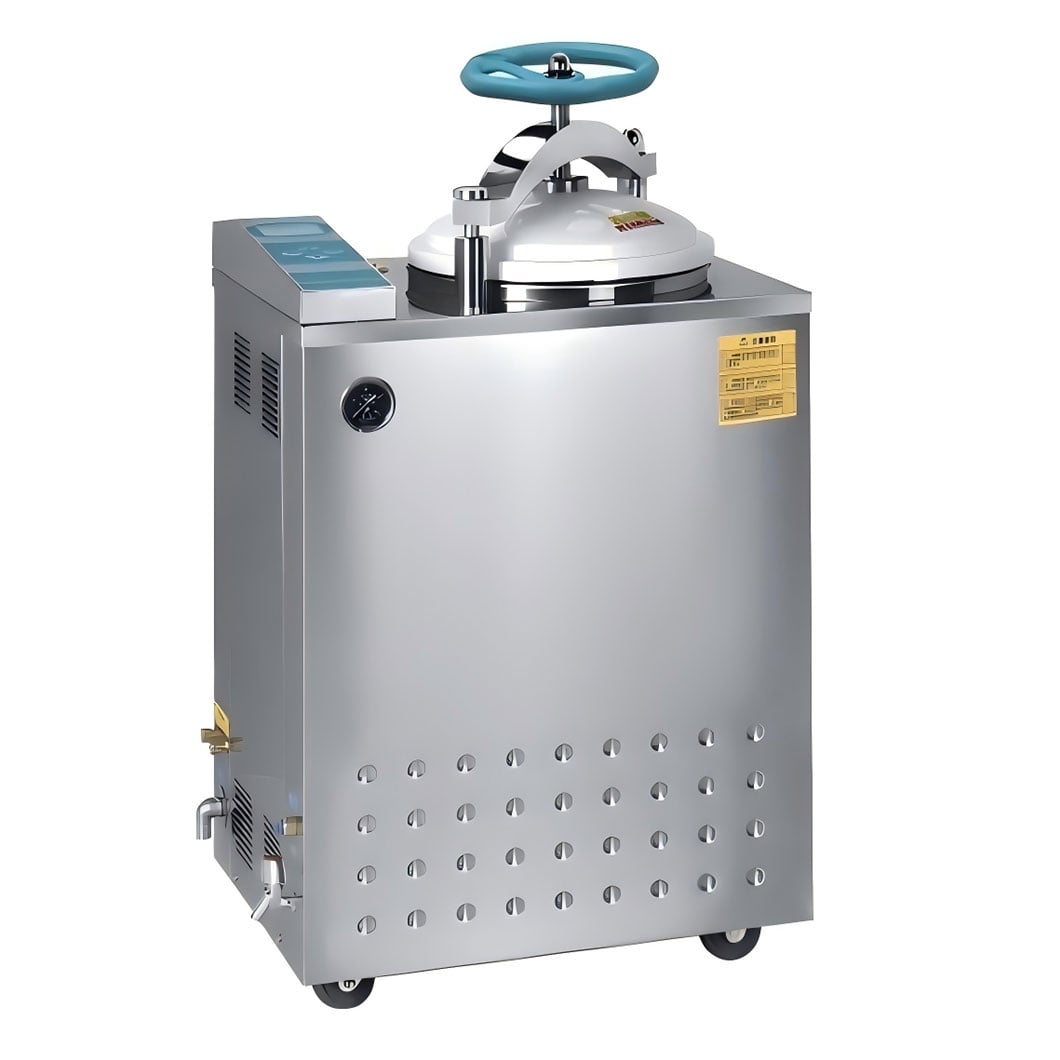 Chamber volume becomes useful capacity only when the load can be spaced and processed as intended.
Compare chamber geometry and loading configuration together
Two chambers with similar volume can behave differently in daily use. Ask suppliers to show the usable rack layout and recommended load pattern for the instruments you process. A horizontal chamber may suit one flow, while a vertical layout may fit another; neither format is universally superior. The relevant comparison is whether the configuration accommodates the intended trays and permits the required spacing.
| Comparison point | What to verify | Why it changes practical capacity |
|---|---|---|
| Rack and shelf layout | Number of levels, clear height, tray dimensions, removable racks | Defines which prepared sets can be loaded without crowding. |
| Door and access | Opening direction, clearance, cart interface, loading height | Influences safe handling and whether the planned load can be placed consistently. |
| Load orientation | Manufacturer instructions for pouches, containers, hollow items, and textiles | Helps preserve steam contact and drainage rather than maximizing fill. |
| Cycle options | Cycles available for the intended load types and packaging | Affects whether the autoclave can support the workflow without inappropriate substitutions. |
| Drying and unloading | Drying performance, cooling space, release process | Limits real throughput even when the chamber is physically large. |
A useful test is to sketch a representative load on the supplier’s rack drawing. If the drawing requires packs to touch, stack, or crowd the chamber walls, the apparent autoclave chamber capacity is not the capacity you should use for planning.
Use validation to define the working load envelope
Sterilization cycle validation connects the purchase decision to reliable use. The selected cycle and loading pattern must suit the intended instruments and packaging; a chamber volume does not validate itself. Ask how the proposed autoclave will be qualified for the representative loads you intend to run, which records are available, and how changes in packaging or load composition are controlled under your local procedures.
For each candidate autoclave, document a working load envelope: the largest routine load, the most challenging load configuration, the expected cycle, and the monitoring and release steps required by your facility. The exact validation approach should follow applicable regulations, the device and packaging instructions for use, manufacturer documentation, and your infection-prevention or quality system. Do not treat a successful empty-chamber test as proof that every future load is appropriate.
Calculate throughput with a realistic cycle clock
Estimate capacity per shift by using the entire process clock, not exposure time alone. Include receiving, cleaning and preparation outside the sterilizer, loading, the selected autoclave cycle, drying, cooling, unloading, inspection, and release documentation. This makes it easier to see whether a larger autoclave, an additional unit, a different rack configuration, or better scheduling addresses the true bottleneck.
For example, a larger chamber may reduce the number of cycles, yet it can also create a larger single-load risk if a process issue requires rework. A smaller autoclave may support more frequent, predictable batches where demand is distributed. The appropriate choice depends on actual instruments, staffing, layout, and validated process—not a universal liters-to-trays conversion.
Plan autoclave maintenance and installation before purchase
Autoclave maintenance deserves a place in the sizing decision. Confirm water requirements, drainage, electrical supply, ventilation, service access, routine checks, spare-part support, and the time needed to take the unit out of service. A chamber that fits the load but cannot be serviced safely in its installed position can create avoidable downtime.
Also verify the room path: delivery route, floor loading where relevant, door width, operator clearance, dirty-to-clean workflow, and space for cooling or staging. These details are especially important when a larger autoclave is considered as a remedy for a throughput problem.
A procurement checklist for medical instrument processing
- List the routine, peak, and most challenging instrument loads.
- Measure prepared tray and pack dimensions, then compare them with usable rack geometry.
- Confirm recommended loading orientation and required spacing for each representative load.
- Match intended loads to available cycles and document the proposed sterilization cycle validation path.
- Calculate throughput using the complete autoclave process clock, including drying and release.
- Review installation conditions, preventive maintenance responsibilities, and downtime coverage.
- Use a site-specific acceptance and training plan before placing the autoclave into routine service.
Make the capacity decision defensible
The right autoclave is the one whose chamber, rack geometry, cycles, installation conditions, and validated loading configuration fit the work you actually perform. Compare candidate units with the same representative loads and the same full-cycle assumptions. That produces a clearer decision than comparing liters alone—and gives procurement, clinical users, and engineering teams a shared basis for discussion.
Before final selection, request a configuration review built around your own trays, packages, and workflow. A documented load map and validation plan will usually reveal whether you need more chamber volume, a different loading arrangement, a different cycle capability, or a stronger maintenance and scheduling plan.
 Hot News